Sunday, November 21, 2010

Baked Sunday Mornings: Nutella Scones

When I saw that a new group was starting up to bake through Baked Explorations I knew I had to join. Back in October I went to a class at Central Market taught by the authors Matt and Renato where they demonstrated some of the new recipes. I really liked everything they made so I thought it would be really fun to bake through both of their books.

So, today is the first day of Baked Sunday Mornings, and we started with the Nutella Scones. I actually had this recipe flagged to try. My husband just started buying Nutella, and he really likes scones so I thought he would really enjoy these.

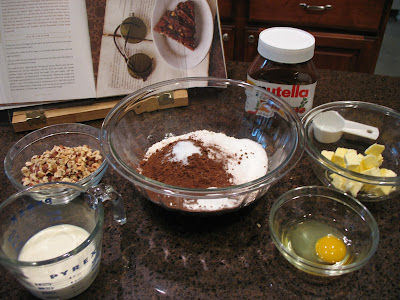
The recipe is really simple. It doesn't even require pulling out the mixer. After I went to the grocery store this morning (to avoid the Thanksgiving rush later today) I got all of the ingredients out and ready to bake.


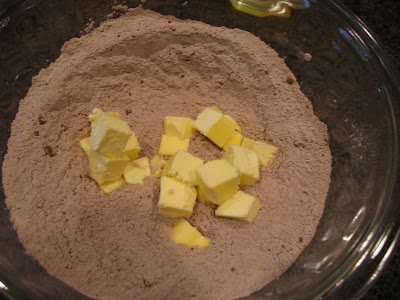
First I whisked together all dry ingredients and then added the butter. I've never actually made scones before so I was a little unsure about how much to mix and didn't want to over mix.


Next up you add in the wet ingredients. It almost seemed like there was enough moisture, but it did come together.


After kneading it a little and forming it into a rectangle you spread half of the Nutella on the mixture in a criss-cross.


Next you roll it up and then push it down into a disk and cut slices to put on a baking sheet.


Once they came out the oven and cooled I spread the rest of the Nutella on them. For some reason it just didn't want to pour very well. I put it in the microwave longer, and that just didn't help much.


I liked them. I'm not a huge fan of scones, but these were still a little moist and the chocolate helps. My husband said they were really good. He said they were a little moister than most scones he buys and liked the flavor as well.

Tuesday, November 16, 2010

The Bostini


Since I missed out on making the Bostini a couple weeks ago while I was recovering from foot surgery and because it got such rave reviews I decided I had to make it for the free choice week. The only problem was there were a few other recipes I wanted to try and not enough time for them. I actually had the ingredients for 5 different recipes that I thought about making. I probably would have made the pumpkin cheesecake as well, but I went to a puff pastry class on Saturday and spent part of the rest of the weekend turning my dough from the class. (Hopefully I'll have a post up on that in the next couple days.)

I started with the Orange Glow Chiffon Cupcake batter Saturday evening. It was pretty simple. The only parts that were at all difficult were trying to squeeze the juice out of the stupid oranges and having to clean the mixing bowl and beater part way through making the batter. With the orange I remembered that if you roll the orange between your hand and the counter prior to cutting it will be easier to squeeze.

First you mix the dry ingredients and then make a well in the center to pour most of the wet ingredients.


Then you mix those together and pour in another bowl if you don't have two mixer bowls. I've considered buying another mixer bowl, but I can't decide if I would rather just ask for the 6 quart Kitchen Aid mixer for Christmas (it's between that and a new camera for taking better blog pictures). I currently have the 5 quart, but I've been told that anyone who bakes a lot should really get the larger, more powerful one. I told my husband that Alton Brown said that in his baking book.


Once you have that bowl cleaned you beat the egg whites, sugar, and cream of tartar to a stiff meringue and then fold the that with the batter. And then it goes into the muffin pan.


I guess I got a little greedy when filling my pans because I overfilled them a little. Oh, well. They still tasted good.


On Sunday evening I finally got around the finishing the Bostini. I got everything out to make the cream. I was a little nervous about this part because I had never made a custard or cream like this before. For some reason my large organic eggs just aren't very large. I had to use an entire extra yolk to equal the weight we were supposed to have. My husband went to the store earlier that day and accidentally bought jumbo eggs instead of large ones so I wonder if those yolks would actually be the right size. Also, I decided to use vanilla bean paste instead of the seeds from the vanilla bean, but I did use a previously used vanilla bean pod when cooking the cream.


First you mix the sugar salt and vanilla seeds (or paste in my case), and then you scald the cream, sugar mix, and vanilla pod. This part seemed to take forever. Maybe my pan was too big, but I was scared to have too small of a pan after what happened the last time I made caramel.

Then you add some cream to the eggs before adding the egg mixture to the cream. Then you whisk the cream until it thickens. It sure is starting to look good now.


Then you pour it through a strainer and into a bowl. I didn't even notice all of the steam at the time. I think I was too busy trying to get every last drop from the pan into the bowl.


Then you whisk the cream to allow it to cool and pour it into the cups. I guess my espresso glasses were bigger than the ones in the book because I only ended up with enough cream to fill 4 of them. That's all I had so it worked out okay. Plus, there are only two of us so we certainly didn't need 8 Bostinis.


This chocolate sauce was super easy to make - just chocolate and butter. The recipe called for dark chocolate, but since my husband's only requirement for the cake choice was no bittersweet chocolate I used the semi-sweet Callebaut chocolate I got at Central Market. Funny thing was when he ate the Bostini he said it would have been okay with a more bitter chocolate.


Daniel and I both really loved this one. The cream was definitely my favorite part of this one. It certainly lived up to the rave reviews. After making this I feel like trying to make other custard desserts.


Monday, November 8, 2010

Swedish Pear and Almond Cream Cake


I've missed baking with the HCB group, but the last couple weeks my foot just wouldn't tolerate it. When I read through this recipe I thought I might be able to make this one even though I would still be on crutches because it really looked very simple. The weekend before I realized that I could use one of our rolling office chairs to get around the kitchen and get ingredients out. So, I had my husband pick up the almond cream and pears at the store. I had never purchased almond cream before but I thought I remembered seeing it near the chocolate. I found it online and showed him a picture before he went to the store.

First I made the almond cream. It was pretty simple to make. The food processor does all of the work. (The small bowl and blade worked great for this and took up less space in the dishwasher.) The hardest part for me was getting the ingredients out and doing the dishes afterwards. It's amazing how long it takes to get ingredients out when you can't walk around the kitchen. I was glad the recipe said it could be refrigerated because I could really only handle a short amount of time in the kitchen.

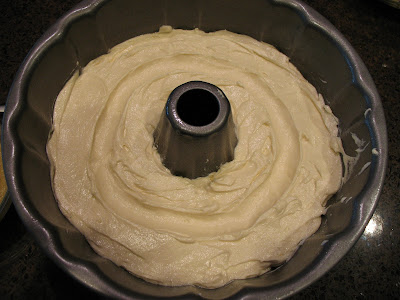
After a little break I got out the ingredients for the batter and mixed up the batter which was also very simple. I made the trough around the inside of the batter for the cream. When I added the cream I wondered if the trough was really wide enough or deep enough because the cream didn't all fit in there.


I think I misread the directions a little. When I read that the pears needed to be sliced in 1/8th inch slices I was thinking about the slices I would normally cut for a fruit salad. Then I thought the pears were only supposed to go over the cream and not layered over the whole top of the batter. I thought something seemed off, but I just went with it.


The cream spread a little on the top of the cake. I was a little concerned it was going to burn, but it looked okay when I pulled it out of the oven.


This cake was very simple, but it tasted really good. The crumb was very small and soft. My husband really liked how the outside was hard and slightly crunchy, and the inside was very soft. It definitely could have used the extra pear that I left out, but that's okay.


Wednesday, November 3, 2010

Petit Four Cakes


Last night I went to a Petit Fours class. I had signed up for this class well before I scheduled surgery. I was looking forward to the class but not looking forward to how my foot would deal with sitting in class the whole time. Even at work I can prop it up on my desk with a small pillow under it and wrapped with an ice pack.

The evening didn't start out great, but it ended up being a fun class. It was raining, and I found out when I got there that there isn't any handicapped parking and all of the spaces right in front of the store were taken. I freaked out a little because I'm still on crutches and not supposed to get my foot wet. I managed to get inside and was pretty upset, but then things got better. Heidi, our instructor, helped me get situated with my foot propped up, and everyone was really helpful the rest of the evening.

For those like me who thought that a petit four is just a little square cake with icing around it I learned last night that they are really just any bite sized dessert. You should be able to eat them in just a bite or two. The bite sized cakes are petit four cakes.

First we went over the two cake recipes - vanilla bean cake and chocolate cake. She said we can use a variety of pans to bake them in. In class we used a jelly roll pan, a silicon mold with individual one inch square openings, and a metal pan with small flower shapes. Next we made the icings - chocolate ganache and petit four icing. She also gave us a white chocolate ganache recipe which might be a good alternative to the petit four icing, but if you want to color the chocolate you have to use water based color. For the petit four icing you can use gel based color just like you would use for buttercream frosting. All of the recipes were really simple.

Then we learned how to cut the cake from the jelly roll pan. It's important to be pretty precise when cutting those so you end up with fairly uniform sizes of petit fours. A ruler is a must for that. Our instructor recommended scoring where you want to make your cuts before actually cutting. We spread raspberry preserves without seeds in between two of the 1 inch square pieces of cake.


Everyone seemed to be having problems with the petit four icing. It just didn't want to stay fluid enough. We ended up with some pretty ugly little petit fours. I'm not quite sure if these ones really qualified as petit fours anymore, but my husband still like the ones I took home. He really liked that icing. He already requested these petit fours for his birthday next year.


The chocolate ganache was much more cooperative. It stayed nice and fluid the whole night. Only problem with that was the petit fours were harder to move after covering them because they stayed sticky.


After covering them with the icing we got to do a little decorating with tiny gumpaste flowers and chocolate drizzled with a parchment bag. That reminded me that I really should practice making parchment bags because it's quite a bit cheaper than a plastic piping bag especially for something like this. Besides, with parchment bags you can reheat the chocolate in the microwave to make it a little more fluid. I think mine turned out pretty cute. Fortunately I got help from Heidi and one of the store employees getting to my car after the class.


Thursday, October 28, 2010

Birthday Cinnamon Rolls


When I asked my husband what his favorite breakfast food was besides waffles (he eats them frequently) he said cinnamon rolls from the can. I thought surely I could find a scratch recipe better than cinnamon rolls out of the can. So, looking through my cookbooks I found one in the Weekend Baker. Perfect! It told me what things I could do ahead so I could just stick them in the oven in the morning. Also, I was looking at Abby Dodge's blog and found a small tweak to the recipe that increased the cinnamon and flour. I had never made cinnamon rolls before, but after making brioche a few weeks ago I had a little more confidence in my bread making abilities. These were so easy to make.

First you make the dough. That was easy though it seemed to take longer for my dough to mix up and start pulling away from the bottom of the bowl. I couldn't turn up the mixer speed too much or it would start walking away. Then it had to rise for about 50 minutes.


In between working on the icing for the caramel apple cake I made the filling for the cinnamon rolls with the increased amounts of cinnamon and flour. Another simple step.


Next up, it was time to roll out the dough and spread the filling.


Then I rolled them up and sliced them. Some of mine ended up being a little bigger than they were supposed to be, but that wasn't a problem.


Then I set them in the baking dish. That was also easy enough. I let them rise while I finished the cake and then put them in the fridge overnight.


The next morning I got up early, started the oven, pulled them out of the fridge, and started the icing topping. I put them in the oven and continued getting ready for work. Not too long after that they were done, and we sat down to homemade cinnamon rolls for breakfast. My husband really enjoyed them. I think those might replace the canned variety as his new favorite!

Wednesday, October 27, 2010

Caramel Apple Birthday Cake


My husband's birthday was last Wednesday. Originally he said he wanted a cookies and cream cake, but then after having cookies and cream cupcakes the Friday before he was sick of that combo. Since I got to taste the Caramel Apple Cake at the Baked Explorations class I convinced him to let me make it for his birthday.

I didn't have any time to bake it the weekend before his birthday so the process started Monday night around 8:30. The cake batter is pretty simple, and it smells amazing before you even put it in the oven. It has all of the spices of a pumpkin pie so it's definitely a perfect fall pie. There's a note in the recipe telling you how to make your own applesauce for it, but I just bought some. Unfortunately I didn't realize when I went to the store that it called for 4 cups so I only bought one jar and then had to go back when I started getting the ingredients out.
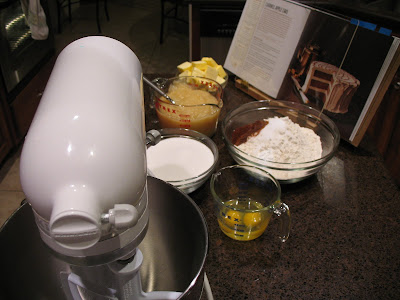

The applesauce and flour mixture go in last. I used the tip I learned in the Baked class about using a scoop to evenly distribute the batter between the 3 pans. I definitely need a bigger scoop because that seemed to take a while, but they were pretty even.


The only real problem I ran into with baking the cake was I didn't let it sit in the pan long enough because it was late and I really wanted to get to sleep. That ended up being a bad decision because one of the layers started to split down the middle. Oh, well. I figured I would just fix that with icing later and deal with it. I wrapped up the layers Tuesday morning before work.


Tuesday evening was busy. I had decided to make homemade cinnamon rolls in addition to the cake (another post to come on those). First up was the caramel for the icing because it was supposed to be room temperature for the icing. I was determined to not burn the caramel this time. I watched the temperature closely and also went by look. I even remembered that the heavy cream needed to be warmed up prior to adding it to the hot sugar mixture. But, I think I added the cream too quickly or my pot was too short and ended up with caramel boiling over the top of the pan, making a huge mess. I probably should have either started over or at least cut back on the amount of butter I added, but I didn't. It looked okay, but it was definitely very buttery flavored caramel. (Tastes good on vanilla ice cream though!)


Late that night I started on the rest of the icing. It starts out with a roux. The recipe says to whisk it occasionally, but I think I should have whisked a little more because some of the sugar and flour got stuck on the bottom of the pan.


Once the roux is done it goes in a mixing bowl and is mixed until it cools to room temperature. I forgot to strain mine, but it only affected the texture a little bit. And, then more butter goes in. Again, I should have cut back on the butter after the problematic caramel, but I didn't.


After finishing the icing the consistency wasn't quite right so I stuck in the fridge while I finished getting the cinnamon rolls ready. Then I got the cake iced. Despite the problem with the one layer splitting it didn't really cause too much of a problem while icing.


I decided to try to do the same design as the picture in the book. I used a piping bag with a small hole cut at the tip to put circles around the cake and then ran a toothpick from the center to the outside to complete the look. I guess it's not really a birthday design, but it looks cool. My husband really only cares about how it tastes anyway. :)


This cake was so, so moist! The icing was definitely a little buttery so I will have to try making it again because I know it should taste even better. Everyone at the birthday party enjoyed it. The main comment was on the moistness.

Monday, October 18, 2010

Many-Splendored Quick Bread and Other Weekend Events


This weekend was filled with baking, cooking, and cake decorating events. First there was the Baked class on Friday which I already posted about. Then Saturday evening my husband and I went to an Alton Brown book signing. He did a question and answer for about 45 minutes and then signed books. Fortunately I had gotten a couple of tickets to the event earlier in the week because there was a huge line out the door for those who didn't. He was really nice and just as quirky as he seems in Good Eats.


Then Sunday afternoon I went to an intro class on gelatin flowers. It was a neat technique, but I don't know if it's something that I would do on my own for a cake. I think I prefer the look of gumpaste flowers. Plus, we used disco dust (aka non-toxic glitter) on these and I ended up with it all over me.


When I got home I was going to start dinner, but my husband wasn't hungry so I started the quick bread instead. That was the cake of the week for the HCB group though it isn't really a cake, but it was nice to have something quick to make. I started getting out all of the ingredients and then realized that I had thrown out the canola oil earlier in the week because it was expired so I did a quick trip to the store to get more. The only thing that really took much time was getting the ingredients together because I used the food processor to shred the carrot and zucchini.


Other than that the only part that took much time was toasted the walnuts and attempting to remove the skins. But, after the challenges of some of the other recipes that really wasn't a big deal. I baked it while cooking dinner, and I managed to convince myself to let it cool some before slicing it. The bread was very moist. I love the green and orange specks in it! It almost looks healthy.