Monday, December 27, 2010

Cranberry Crown Cheesecake and Christmas Pies

Since this week's selection for the Heavenly Bakers was very appropriate for holiday celebrations and because I was already taking two pies to my in-laws' house for Christmas dinner I planned to take this cheesecake to my mom's house for our smaller Christmas lunch. And, since I had recently purchased the correct size of tip to make ladyfingers I decided to try them again. Besides, my previous ones didn't get posted since I didn't actually finish making the lemon crown (maybe I'll try again sometime). For some reason my ladyfinger batter doesn't soak in all of the powdered sugar. Here are one of the sheets of completed lady fingers:


I opted to make a round ladyfinger base like we did for the lemon crown rather than positioning the individual ladyfinger across the base.

The cheesecake filling came together very quickly. I wrapped the springform pan with foil and then put the whole thing in one of my 12" cake pans with water. Water in the pan sure does make it difficult to carry to and from the oven.

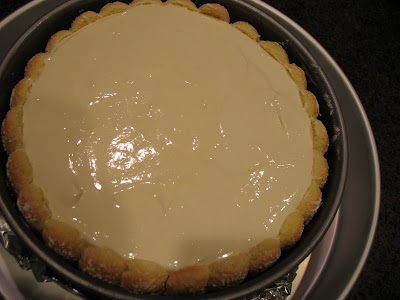
It looked really good when it came out of the oven. I left it out to cool for about an hour and then covered it with a bowl and stuck it in the fridge.

There was a little condensation on the bowl in the morning. That moisture caused the ladyfingers to get a little soggy, but they weren't bad. The cranberry topping came together very quickly. It took a minute or two longer than the recipe indicated to get the cranberries to pop but not that long. I found some ribbon that perfectly matched the color of the cranberries and wrapped it around the cheesecake. Then I played with my Christmas gift (a SLR camera) to try to get a nice picture of the cheesecake. I still have lots to learn on how to use it.

I took the cheesecake to my mom's house, and it was well received by everyone there. It sat out a bit so it wasn't as hard as it should have been, but it still tasted great. Daniel who doesn't normally care for cheesecake really loved it. He liked how it wasn't quite as rich as normal cheesecakes.

I also made two other pies for Christmas - the Pecan Tart from the Pie and Pastry Bible and a cherry pie from Cooking Light. My MIL requested I bring the pecan tart for Christmas dinner, and my brother loves cherry pie so I had to make that one as well. I realized part way through making the pecan tart that I was actually using the wrong pie dough for it, but that ended up being a good thing because I had better luck with the Basic Flaky dough than the Cream Cheese dough which I also tried making. I really like Alton Brown's method of cutting the edges of the ziplock bag and using the bag to roll out the dough. It worked well for the basic dough, but that's where I ran into problems with the cream cheese dough.

I had better luck with the par baked tart shell this time than I did for Thanksgiving. I turned the oven temperature down 25 degrees. I decided to do two layers of pecans this time because it just seemed a little shallow last time I made it.

I had some leftover whipped cream from the coconut cake last week that I rewhipped and then piped onto the pecan tart and my mom's pumpkin pie. I think this has now become on of my favorite pies. Daniel seems to love it as well. I really like the chocolate lace topping on it.

I had originally planned to make the cherry pie from the pie and pastry bible, but my cream cheese pie dough just completely fell apart when I rolled it out so I went with my backup plan. I made the recipe from Cooking Light which I had made before. It calls for store bought crust but still uses fresh cherries. While pitting the cherries this year I decided that my little brother needs to come help with that part next year. Since I used the store bought crust I decided to focus more on my lattice work. I think it turned out much nicer than normal. It's amazing what a ruler can do for you.

Some of the cherry filling bubbled out a little over the lattice so it wasn't quite as pretty when it came out of the oven, but it still tasted great.

Several people in my family have commented that they were never huge fans of cherry pie until I started making them. I've made this recipe 3 or 4 times now, and it always turns out wonderful.

Sunday, December 19, 2010

HCB: Heavenly Coconut Seduction Cake


This week was another free choice week for the Heavenly Cake Bakers, and since I just joined the group a few months ago I have plenty of cake to choose from to catch up on. This particular cake had been calling my name ever since I got my copy of Rose's Heavenly Cakes last Christmas. The whipped cream icing isn't something that I would normally love because it's much lighter, but the fluffy icing just looks heavenly with the coconut on top. So, when I realized that our free choice week was going to fall on the same week as my in-laws' dinner party I volunteered to bring this. Only problem was the party was on Friday, and I ended up being incredibly busy the whole week. I also had a truffles class on Thursday from 6:00 to 9:00, but I decided that the cake seemed simple enough for me to throw together after the class. Wednesday night before going to bed I put out all of the non-perishable ingredients so that would be one less step for me. Then when I left the class I called Daniel and asked him to pull the butter out of the fridge so it would be softened by the time I got home.

When I got home I got all of the ingredients measured and the pan lined with parchment. I wish the bake shop sold 9 inch parchment circles. They sell most of the even number sizes, but not 9. It sure would make my cake baking even simpler.

First you mix the wet ingredients including part of the cream of coconut.

Then the directions say to process the sugar and coconut. Apparently my brain wasn't working at almost 10pm because I put in the rest of the cream of coconut instead of the dried unsweetened coconut. Fortunately I realized it and scooped out as much as I could and continued on with the processing. It didn't seem to cause any problems. Next you mix the dry ingredients.

Then the butter and remaining cream of coconut get added to the dry ingredients.

Then you add the egg mixture and it's ready to go in the pan.

The bake time was pretty quick. It gave me just enough time to clean up my dishes and throw together lunch for the next day. Including baking time this cake came together in about an hour.

I waited to make the whipped cream until the next day right before going to the party, and that was just as quick as the cake. I had wanted to do something fancier with the cake, but there was just no time for that. So, I went with my standard shells and rosettes.

Everyone at the dinner loved the cake. Everyone commented on how light it tasted. Daniel even loved it, and he's like me in that he prefers buttercream to whipped cream icing.

Wednesday, December 15, 2010

HCB: Financier-Style Vanilla Bean Poundcake


I've been so busy with holiday baking lately that I haven't had time to post anything here. I'm going to try to play catch up over the next few days. I actually made these little cakes on Saturday afternoon because I had a big cookie decorating project to do Saturday evening and Sunday (and still more to do Tuesday evening).

If we thought last week's cake was simple this one was even easier to make. I had ordered my financier pan a few weeks ago, but I didn't realize that it was actually a mini financier pan so mine were about half the size they should have been. I guess I'll have to get the regular size one sometime. The batter came together pretty quickly. The only part that took much time was pulling out the food processor to process the sugar and vanilla bean. I also recently purchased a larger piping tip so I was able to pipe the batter into the pan. I had a little extra batter so I baked it in one of my holiday cookie pans (that I use for candy not cookies), but they stuck to the pan a little so the details were lost.


I guess I overfilled them a bit because the ran over the edges, but I just trimmed off the excess. For some reason those little pieces that you trim off always seem to taste better than the rest of the cake.


And, in case you want a sneak preview of what ate up all of my time, here are my finished cookies. I will try to get another post up later this week about the cookies.


Wednesday, December 8, 2010

Heavenly Cake Bakers: Chocolate Velvet Fudge Cake


This is going to be a quick post. I had planned to bake this cake on Sunday, and then I ended up being super busy. Then Monday I thought I would have time, but we took our cat to the specialty vet for surgery in the morning and then ended up at the emergency vet with our dog in the evening. So, I finally got around to baking this cake last night. Good thing it was a super simple cake because I didn't get started making it until after 9:00 last night.

Misen place minus the cocoa and water mixture which was already in the fridge cooling:


This batter came together very quick. First you mix the dry ingredients and then add in the butter and cocoa mixture.


Then you add in the egg mixture. The batter looks really good at this point.


The directions for the recipe said to use a silicon pan and put it on a wire rack on top of a baking sheet. I didn't know if I still needed to do that with a metal pan, but I did anyway. Only problem is it looks like the cake got a little dark on top, but it looked fine once it came out of the pan.


I finished baking the cake just before 11:00 so neither of us really wanted to have a slice right before going to bed. I'll have to update this post tonight after we've tried the cake.

I'm a little late updating this post. There have just been too many things going on lately. My husband and I did taste the cake that morning and really liked it. My husband especially liked how moist it was. I tend to prefer cakes with icing, but this one was really good.


Sunday, December 5, 2010

BAKED Sunday Mornings: Sweet & Salty Brownie


This week's selection for BAKED Sunday Mornings is the Sweet & Salty Brownie. I was really looking forward to making these. I got to try them in the class I took with Matt and Renato at Central Market and really loved them. The only problem for me was they called for fleur de sel which I didn't have. When I went to the grocery store the only kind they had was $14 for the small container, and I really didn't want to spend that much on it so I decided to substitute regular sea salt which I already had.

The first step for making the brownies is to make caramel. Caramel has become one of my baking nemesis. Last time I made some for the Caramel Apple Cake it boiled over. I was determined to not let that happen this time. I think I just needed to make sure the cream was warm (which I did last time) and pour it in very, very slowly. Only problem this time was my sugar mixture burnt on the first try. I had my thermometer in there, and it never got anywhere near the 350 degrees when it was done.


Things went much better the second time around. I used the thermometer again but only as a gauge to know when it was getting closer. I really just went by color of the sugar mixture. I added the cream in small increments to keep it from boiling over, and it all worked. The only thing I wasn't thrilled with was it was a little too salty tasting with the sea salt rather than fleur de sel. I think I may have to put fleur de sel on my Christmas list (good stocking stuffer).


Next up was time to make the brownie batter. This was pretty simple. It just required using a double boiler to melt the chocolate and butter and then add the sugar.


Once the mixture cools the eggs and then the flour mixture are folded into the rest of the batter. By the way if anyone is wondering what method to use for measuring the flour in these recipes the authors told me they spoon the flour into the measuring cup and then level it with a knife. I personally prefer using weights, but as long as I know which method to use I figure it should come out pretty close to the right amount.


Half of the batter gets spread into a glass pan lined with parchment paper. Then the caramel is spread over that followed by the remaining batter. It then goes into the oven for 30 minutes. Mine took 35.


When they come out of the oven you sprinkle them with fleur de sel and course sugar. I used a little less sea salt than the recipe called for, but I think I should have cut it way down because they were a little salty. I will probably try brushing off a little of the salt before serving them.


Lining the brownie pan with parchment paper sure does make it easy to get the brownies out of the pan. I was actually able to lift them all out which makes serving much easier.


Since I have another thing to bake today and because the authors give instructions for freezing brownies I thought I would give that a try and take some of them to work for our holiday potluck on Friday.


Since I know my husband is one of those who prefers the end pieces, and I don't really have a preference I kept the end ones for us to try. I ate one for breakfast this morning. It was really good, and my only complaint is the salt flavor is a little too much. It's probably the sea salt vs. fleur de sel that caused that so maybe I'll try them again sometime with fleur de sel. The brownies are very moist, and I love the caramel flavor. I have a little caramel leftover so I might try drizzling some with the caramel.